Technology Repair Log

1970's Transistor Hamburger/Cheeseburger Radio Repair #2

Problem:
The radio didn't seem to power on even though the 9v battery was connected.
Troubleshooting:
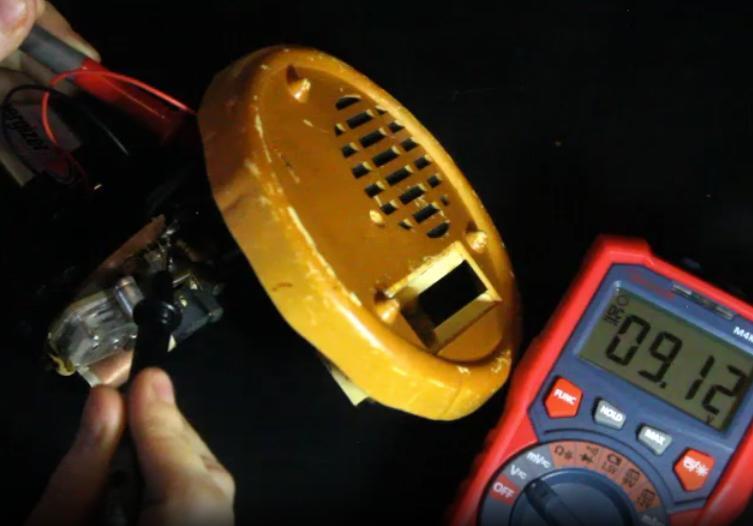
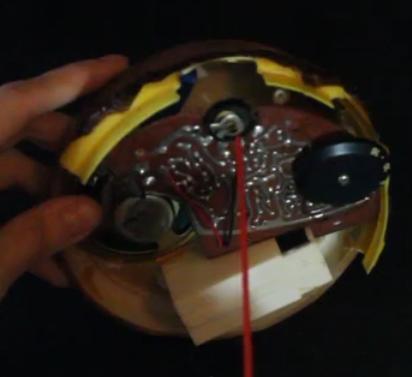
I unscrewed the hamburger to access the PCB. I wanted to make sure the power was actually being supplied to the PCB. To test this I wanted to trace the voltage. I put my multimeter to volts, then put one lead where the negative wire leads to the PCB (located on the bottom of the PCB), and the other positive lead where the positive wire leads on the PCB. This gave a reading of 9v, which means power was successfully reaching the PCB and therefore, the issue is outside of the 9v connector.
At this point I assumed there may be an issue with the potentiometer. The potentiometer is the volume control, and over time the contacts within the potentiometer (where the wiper is) can oxodize or otherwise get dirty, and thus, is not able to make a proper connection. In this scenario, the potentiometer would not be able to lessen the resistance, meaning the volume is not being turned up. Cleaning the contacts could solve this issue. I cleaned the potentiometer (unscrew the volume and taking off the volume knob will expose the wiper/resistor area), and sprayed with Deoxit electronic cleaner.
Note: Be careful putting the volume knob back onto the potentiometer. You don't want the copper on the potentiometer to move out of place. I accidentally moved them out of place and doing this will not allow for there to be a solid connection. This was very difficult to set back in place. Take pictures as you go in case you mess up the copper's orientation.
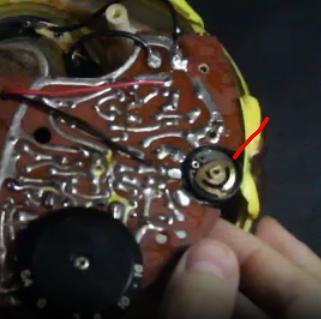
After reassembling the volume knob back together, then supplying power with the battery, the radio still did not work. As I was touching the PCB with power supplied, I noticed that volume would be supplied if I touched a specific area. I continued to narrow down this area until I was back at the potentiometer. When I put pressure on one side of the potentiometer, volume would be present. To clarify, when I put pressure on one of the potentiometer's legs (that connects to the PCB), volume would come back.

I then assumed this leg needed additional solder (solder reflow) to perhaps establish a better connection.
Solution: Reflow solder to one of the legs on the potentiometer.
I added solder to the leg in question. I then powered on the radio and it worked exactly as intended. I don't think this was necessarily a cold solder joint, but, I think there was a part on the potentiometer that had no solder on it compared to the other leg where there was solder in that same area.
Another minimal issue I fixed: Speaker wires fell off.
I am very familiar with how brittle wires in technology 30-40 years old can be. When you move around a PCB enough, old wires start to snap off. It's not a big deal and might be good to confront as you're already working on the PCB fixing something else. However, many times this decision is made for me, as it was during this repair. The wires going from the speaker to the PCB snapped off. Luckily I knew where the wires led to, so I could easily get a new set of wires, strip the ends, then solder them from the speaker to the PCB. If you repair anything, take pictures before and during the repair in case wires snap off. You need to know where they go and without pictures, that task becomes more time consuming.

I successfully repaired both of my "AM"burger radios.
Click here to go back to the log of repaired vintage technology.

 News
News
 Who am I?
 My Monthly Column


 Technology (Tutorials, Opinions, & More)